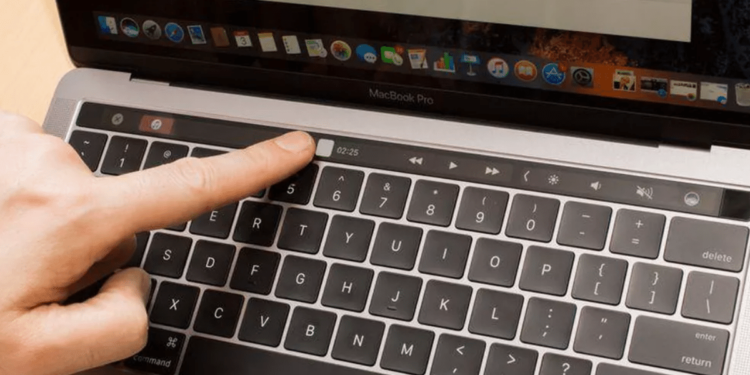
Using a MacBook becomes fun when you start understanding the technicalities of the gadget. Among a huge variety and range of laptops, Apple’s MacBook is one of the most loved ones. However, it is quite difficult to understand every bit of the device when you are a newbie. MacBook comes with a large variety of features that makes work a lot more easier and fun. One of those features is the technique of taking screenshots on a MacBook. There are not just one or two but five ways to take screenshots on a MacBook.

The five super easy techniques of taking screenshots on a MacBook as follows:
1. Using Keyboard Shortcuts:
Just like Windows, there are keyboard shortcuts in MacBooks as well. Here’s how you can take shots on an Apple MacBook Air.
Entire Screen Screenshot:
- Press Shift + Command (?) + 3
- Find the screenshot as a .png file on your desktop
Screenshot of a Selected Portion:
- Press Shift + Command (?) + 4. The pointer changes to a cross hair

- Move the cross hair on the area you want the screenshot of
- While dragging, you can hold Shift, Option, or Space bar to change the way the selection moves
- When you’ve selected the area you want, release your mouse or track pad button. To cancel, press the Esc (Escape) key before you release the button
- Find the screenshot as a .png file on your desktop
Screenshot of a Window:
- Press Shift + Command (?) + 4. The pointer changes to a cross hair

- Press the Space bar. The pointer changes to a camera
- Move the camera to a window to highlight it
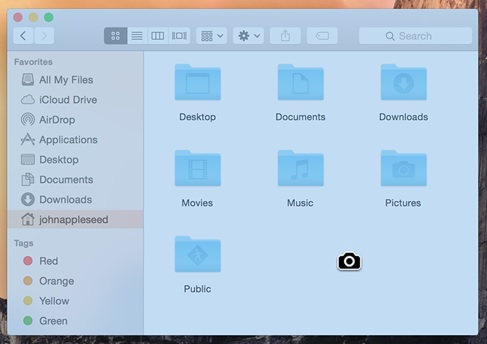
- Click your mouse or track pad. To cancel, press the Esc (Escape) key before you click
- Find the screenshot as a .png file on your desktop
Screenshot of a Menu:
- Click the menu to reveal its contents
- Press Shift + Command (?) + 4. The pointer changes to a cross hair
- Drag to select the menu
- Release your mouse or track pad button. To cancel, press the Esc (Escape) key before you release the button
- Find the screenshot as a .png file on your desktop
If you want to capture just the content of the “Menu” and not the title, here are the steps you need to follow:
- Click the menu to reveal its contents
- Press Shift + Command (?) + 4. The pointer changes to a cross hair
- Press the Space bar. The pointer changes to a camera
- Move the camera over the menu to highlight it
- Click your mouse or track pad. To cancel, press the Esc (Escape) key before you click
- Find the screenshot as a .png file on your desktop
Taking Screenshot of/through a Touch Bar:
There are MacBook variants like MacBook Pro that come with a Touch Bar and macOS Sierra 10.12.2. Here’s how you can take a screenshot using that device touch bar.
- Press Shift + Command (?) + 6
- Find the screenshot as a .png file on your desktop
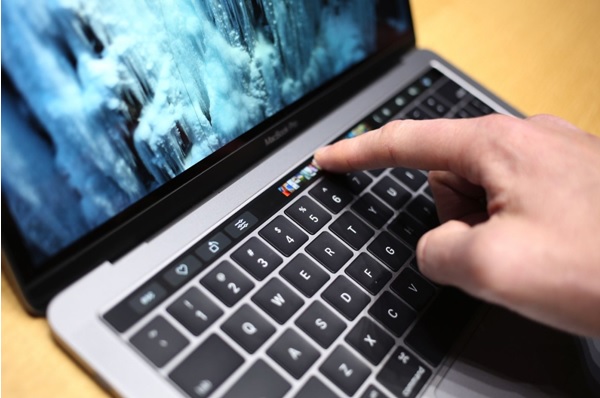
Tip:These touch bars are also customizable. With this, you can put a screenshot option on your touch bar. By pressing the button you will get to different options with which you can take a screenshot and know where to save it.
2. Using Grab
The powerful and popular tool ‘Grab’ is another way you can take a screenshot. You can take multiple screenshots at regular intervals with the help of a built-in timer that this tool has. It can also be used on a MacBook Air with Retina display. The application also allows you to choose between different file formats. You can also modify the dimensions and proportion of the screenshot with its help. All you need is to download and run it. The application will give you options like Timer, Area, File, and Resize upon opening it and the user will also be given freedom to modify the screen’s width and height.
3. Using Apowersoft Mac Screenshot
This is a user-friendly application that is popular among most of the MacBook users. The app allows you to take swift screenshots in the easiest way possible. Also, it allows you to edit the captured shot by adding lines, arrows, texts, etc. The option for making edits pops up immediately after capturing the shot. You can then either save it or upload it to the free space provided by the developer of the app.
If you want to enjoy the application’s functions, just click on the button below to download and install it on your device now.
If you upload the taken screenshot to the free space provided by the developer then to add the picture on any forum or blog all you need to do is to copy and embed the given link on the desired place. The application is popular among user because of its easy techniques. This is the simplest way of taking screenshots on a MacBook.
4. Using Jing
Jing is another application that can make your work easy. Plus the sharing feature that comes with this app in the era of Social Media where we share almost everything we get, makes the app even cooler. MacBook friendly Jing has a quick sharing feature with which you can immediately share the taken screenshot with anyone via social media platforms.
Here’s how you can use this tool on your MacBook:
- As soon as you will launch the program and sun-like icon will appear in the upper right corner of the screen which is also the Jing menu.
- To take a screenshot, click on the icon on the menu that looks like a cross hair.
- Click and drag to select the area to be captured, after that just release the mouse and your screenshot is done to save.
5. Using Snagit
Snagit is one of that tools which is popular among both Windows and Mac users. This application allows you to grab anything on the monitor and provides you with special editing features.
Here’s how you can take a screenshot using Snagit:
- Open the application and move the cursor on the part of the screen you want to capture.
- Click the red Capture button, and an orange cross hair will display.
- After selecting the region you want the screenshot of, click on the camera and you are ready to save your screenshot.
Having Microsoft Windows PC or laptop, no problem. Read on this article to know”How to Take Screenshots in Microsoft Windows Computer“


